Showing 2 Result(s)
Air Flyer

How to Fry Vegetables in an Airfryer

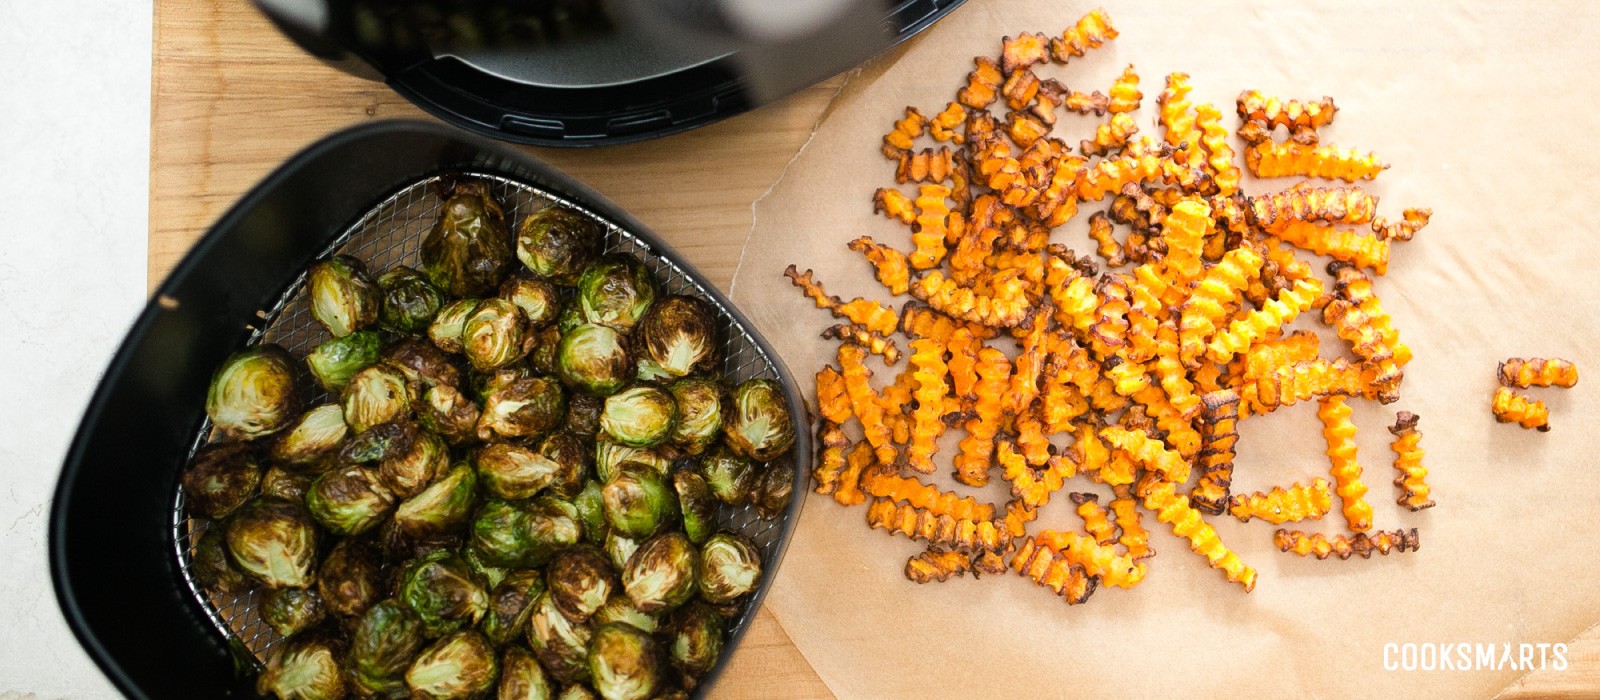
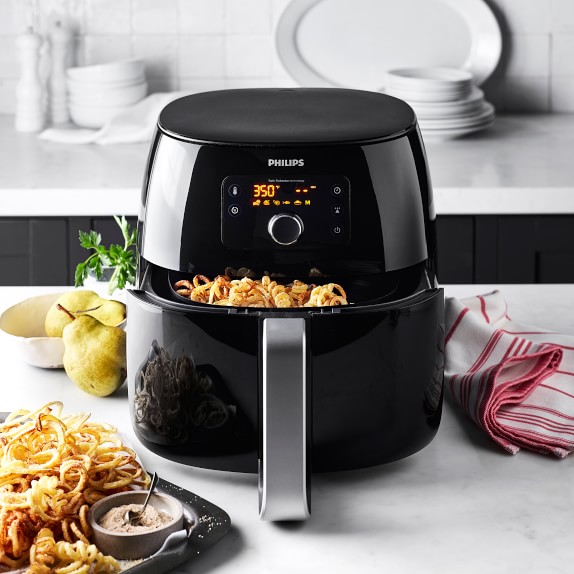
We cannot stop frying veggies with our new airfryer. See how easy it is to create tender on the inside and crispy on the outside fried veggies below!

I’m not a big gadget person but a few years ago, one of our Australian meal plan members told me about her airfryer, and I was immediately intrigued.

I love fried food with the best of them but don’t love dealing with the trouble of heating and discarding a big vat of oil and the greasy smell it leaves in the kitchen. Plus, it’s not exactly the healthiest of options.

An airfryer fries food by circulating hot air around it in a small compartment. It’s like a convection oven but much more contained. It seemed like a great way to “fry” foods without all of the downsides of deep frying.

However, my kitchen just didn’t need another gadget but last week, I was finally convinced. A Nourish student showed off golden egg rolls fried in her airfryer. My husband and I ordered the best fried brussels sprouts from Falasophy in the Fourth Street Market in Santa Ana. And I discovered that Trader Joe’s now sells crinkle cut butternut squash, which clearly were screaming, “Fry me, Jess!”


Clearly a higher power was telling me I needed an airfryer in my life, and I had to answer the call immediately.


I couldn’t even wait for Amazon Prime and actually left work early for Bed, Bath and Beyond (with my stack of 20% off coupons in hand of course) and picked up this Philips Airfryer (there were other options but the Amazon reviews seemed best for the Philips).

It’s been just 3 weeks, and I’ve fallen in love. So far, I’ve made butternut squash and sweet potato fries, fried broccoli, brussels sprouts and green beans, chicken drumsticks, breaded chicken tenders, falafel and NY strip steak in it.

Not everything has turned out great and there are some things that really should be just deep-fried, like falafel or fried chicken. My steak cooked evenly but just didn’t get the caramelized exterior from searing in a cast iron skillet.

However, the most successful dishes have been using the airfryer for crispy vegetables.

PROS:

  • They get the crispiness of deep frying without all the oil and are definitely crispier than oven baking
  • Most veggies seem to cook in 15 to 20 minutes
  • Clean-up is easy
  • My little fickle eater has gobbled up all the veggies we’ve made in it – honestly, it’s a mother’s dream come true
  • Plus, you don’t need a recipe!

HERE ARE THE BASIC STEPS:

  1. Preheat airfryer for about 5 minutes at 360F / 182C degrees.
  2. While the airfryer is heating, prep your veggies. Evenly chop ~1 lb of veggies, toss with some oil (~1 Tbsp / 30mL), salt and pepper. (If making potato or sweet potato fries, soak them in water for ~30 minutes to draw out excess starch for crispier results and then pat dry thoroughly with paper towels before tossing with oil and seasonings.)
  3. Transfer veggies into frying compartment and fry for 15 to 20 minutes, stirring veggies every 5 to 8 minutes or so. Some veggies might need longer and some will need less – just use your judgment when you open the compartment to stir the veggies. You want the outside to be golden and crispy and the inside to be tender.
  4. Enjoy or toss with your favorite dipping sauce when done! If you need sauce ideas, check out 5 of our favorites.

Here’s a video I did on Facebook Live if you want to see it in action.

If you’re now trying to decide whether you should get one too, I wanted to also share the limitations.

CONS:

  • Like I said before, some things are just better deep fried so don’t expect to get traditional fried chicken from an airfryer
  • You don’t want to overcrowd the airfryer so it’s not great for large batch cooking. For meats, I found that you really want to keep everything in 1 layer to get the most golden results. This meant I could only fit in 4 drumsticks or 5 chicken tenders. If I was cooking for a crowd, I honestly would have just baked or broiled in an oven on big sheet pans
  • You do want to flip / stir whatever you’re frying every few minutes so this isn’t a set-it-and-walk-away type of gadget, like a slow cooker
  • This wasn’t the cheapest of appliances (close to $200 USD), which is why it took me 2 years to finally bite the bullet. There are several options on Amazon though, but the Philips and T-Fal models seem to be the most popular. However, with as much as I’ve already used it and the fact that we’ll be going through a kitchen remodel soon where I won’t have an oven, I think I will definitely get my money’s worth.

However, the ease of making crispy, toddler-approved veggies has completely won me over.


I can make multiple batches without washing the basket, so we can have a medley of options. Tonight it’ll be “fried” brussels sprouts and butternut squash fries with leftover chicken tenders. I usually prep my own butternut squash, but these crinkled cut ones from Trader Joe’s are just too convenient and too cute to resist.

Do you have an airfryer? If not . . . the holidays are only 11 months away. 😉

Air Flyer

AIR FRYER BASICS

What is an air fryer, anyway? It’s basically a countertop convection oven with a heated coil (usually at the top), a mesh or metal basket, and a fan that circulates the heat around the foods at convection oven rates. Cooking food in an oven creates steam, and deep-frying works by flash-cooking foods in hot oil, but the air fryer cooking method creates an efficient, intense environment of heat that consequently cooks foods faster and more evenly. This results in crisp, browned exteriors and juicy, tender interiors. It’s much healthier, safer, and cleaner than deep-frying foods, but it doesn’t stop there—with an air fryer, you can also roast vegetables and fish, bake muffins and quiche, reheat leftovers, and heat up frozen foods. It basically does the work of an oven, a deep fryer, and a microwave—all in one.

CHOOSING AND USING YOUR FRYER

  •  Air fryers come in different shapes and sizes, from compact cylindrical countertop styles with a fryer basket (and some even have built-in rotisseries) to convection toaster oven–style fryers. Toaster-style air fryers are larger than most basket-style models, so you can cook most recipes in one batch, which is convenient for larger families. The downside to that is they tend to take up more counter space. Basket-style air fryers, on the other hand, are more compact and come in a variety of sizes. If you’re cooking for just one or two people, a 3-quart basket-style fryer is perfect. If you’re cooking for a family of three or four, you’ll want a model that’s at least 5.5 quarts and up.
    To get consistent results, preheating the air fryer for three minutes is key. If your air fryer doesn’t come with a preheat function, before you begin cooking, simply set the air fryer (with the basket inserted) for three minutes to the temperature you plan on using.
  • Cook times will vary slightly depending on the wattage and brand of your air fryer. All the recipes in this book were tested with the Skinnytaste by Vremi 1,700-watt air fryer and the Cuisinart Air Fryer Toaster Oven. For the best results, get to know your air fryer and make adjustments as needed. And don’t be afraid to open the air fryer to check your food—some models will shut off when opened, but they will continue to cook once you close the lid again.
    An air fryer is also a great tool for reheating foods, much like a microwave, but without making food rubbery. There are really no rules for reheating food in the air fryer—I usually set the temperature to 400°F and check often on the progress of cooking, until the food is hot.”

TIPS FOR FRYER SUCCESS

  • Use olive oil spray. Even though air fryers can cook without oil, foods that are typically deep-fried or breaded will taste best if they’re sprayed with olive oil—and a little goes a long way. For best results, spray both sides of your food with a light spray of olive oil before putting it in the basket. You can purchase an oil mister and fill it with your favorite oil, or you can buy a propellant-free olive oil spray with no additives, such as Bertolli 100% Extra-Virgin Olive Oil Spray.”
  • Don’t forget to flip. Since the air fryer heating element is usually at the top, flipping your food halfway is essential for evenly cooked and browned food on both sides. For smaller foods, such as french fries or vegetables, shaking the basket a few times (rather than flipping) will result in everything getting evenly browned and crisp.”
  • Don’t overcrowd the basket. Always cook food in a single layer. If an item doesn’t fit, cook the food in batches to avoid overcrowding the basket. Overcrowding prevents the air from circulating around the food and keeps it from browning and turning crisp. To ensure food comes out hot and at the same time, once all the food is cooked and browned in batches, you can put it back into the basket and heat it together for one to two minutes.”

AIR FRYER ACCESSORIES

Investing in some accessories opens up your possibilities for making more dishes, such as frittatas, small cakes, skewers, casseroles, and more! Chances are, you may already have some: Any oven-safe baking dish or cake pan that fits in the air fryer without coming into contact with the heating element will work. Disposable mini foil pie pans and cupcake liners are also great for baking.”

CONVERTING RECIPES TO YOUR FRYER

For traditional oven-baked recipes, you can convert them for the air fryer by reducing the temperature by 25°F to 50°F and cutting the bake time almost in half. You can also refer to the chart on this page to determine the best cooking time for foods.